Issue
Provide an example on how to configure a DNP3 point in the BMXNOR0200 to get a timestamp when the point
DNP3 value changes.
Product Line
BMXNOR0200
Environment
Windows 10
Resolution
The following steps can be used to configure the BMXNOR0200 for accessing a DNP3 point with a timestamp
from a SCADA.
Provide an example on how to configure a DNP3 point in the BMXNOR0200 to get a timestamp when the point
DNP3 value changes.
Product Line
BMXNOR0200
Environment
Windows 10
Resolution
The following steps can be used to configure the BMXNOR0200 for accessing a DNP3 point with a timestamp
from a SCADA.
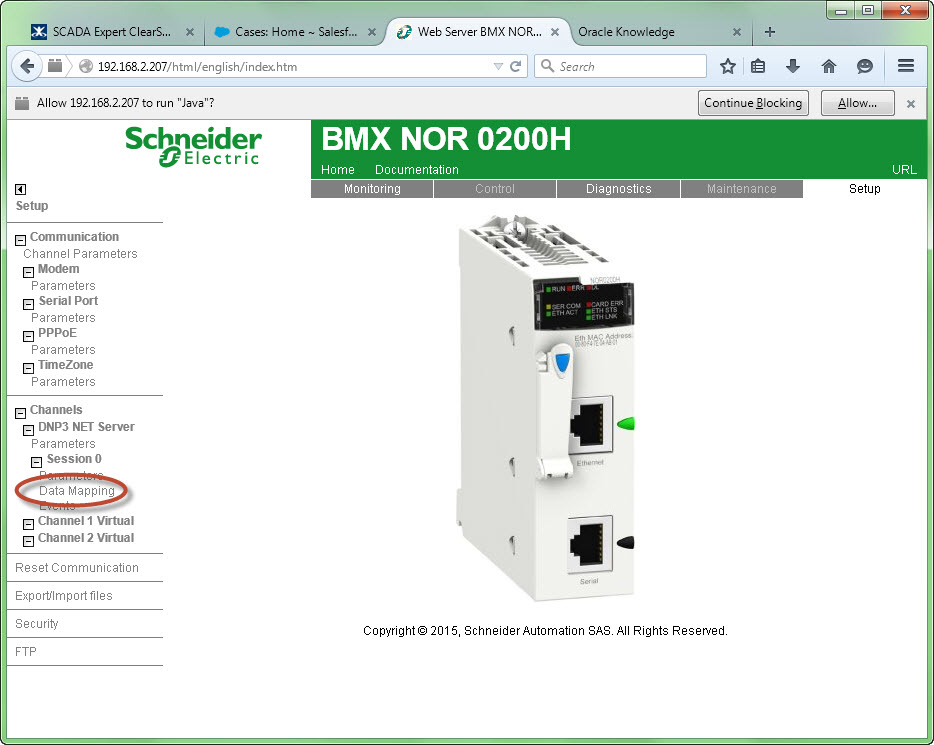
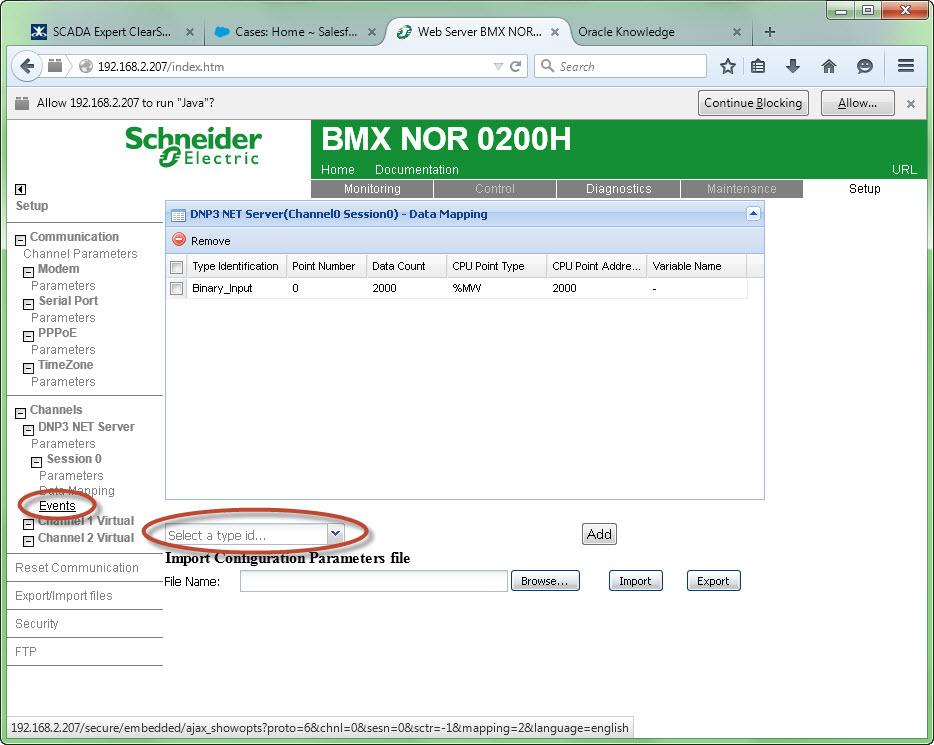
- Click on 'Data Mapping' in the 'Setup' menu list to open the 'Data Mapping' web page.
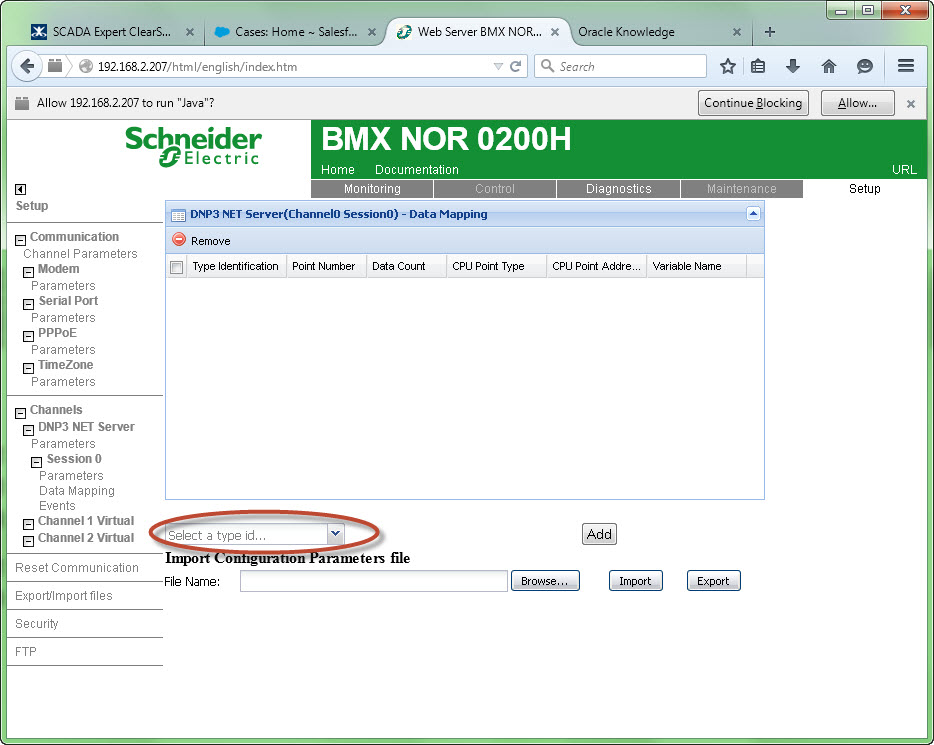
- Click on the down arrow next to the textbox labeled 'Select a type id'
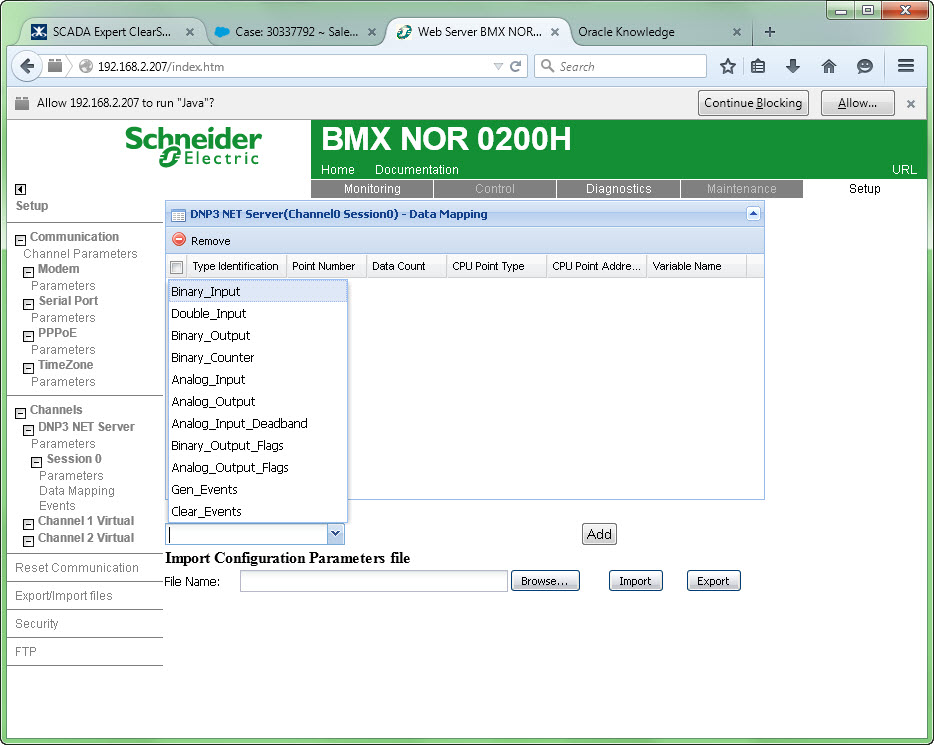
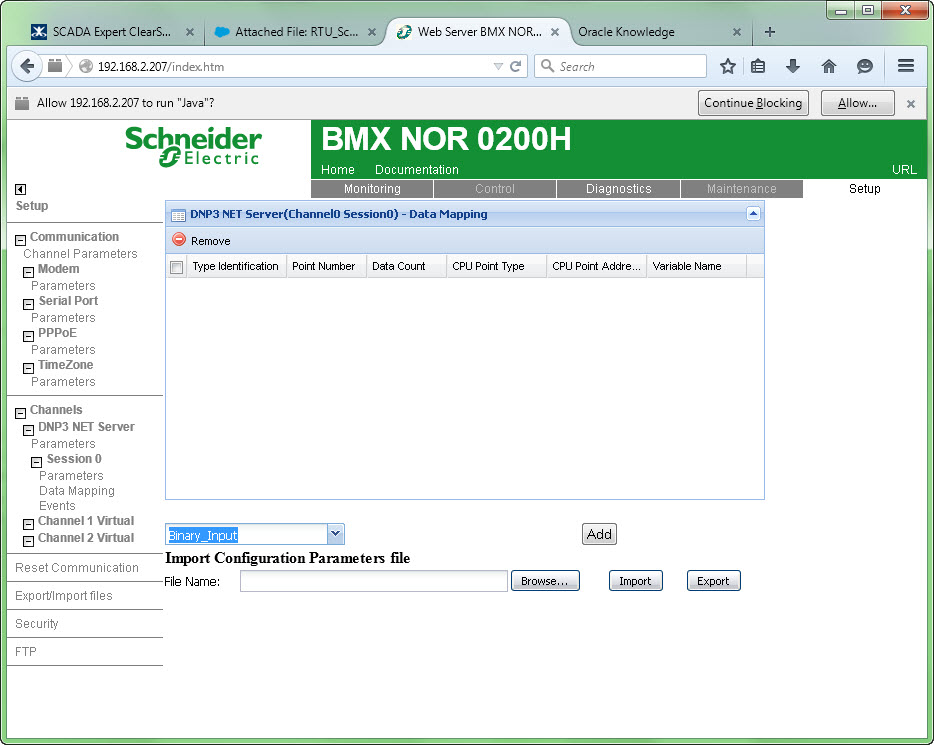
- Select the DNP3 point type from the drop down list.
- Click on Add
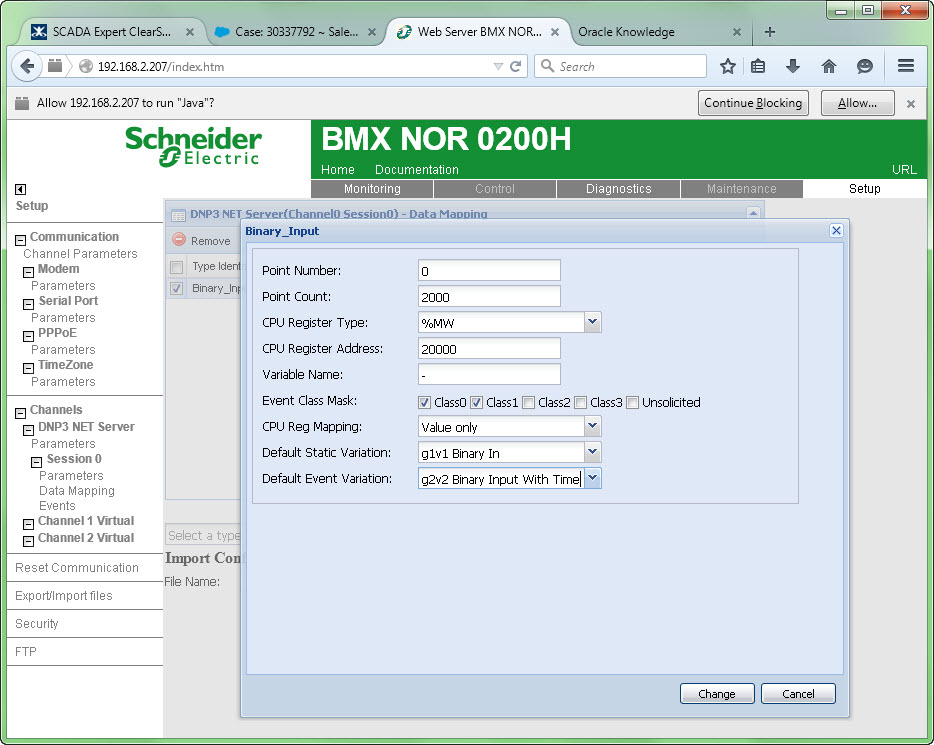
- Enter the appropriate information to define the DNP3 point.
- Select 'CPU Reg Mapping' as 'Value only'.
- Select 'Default Static Variation' as 'g1v1 Binary In'.
- Select 'Default Event Variation' as 'g2v2 Binary Input with time'.
- Click on 'Change'.
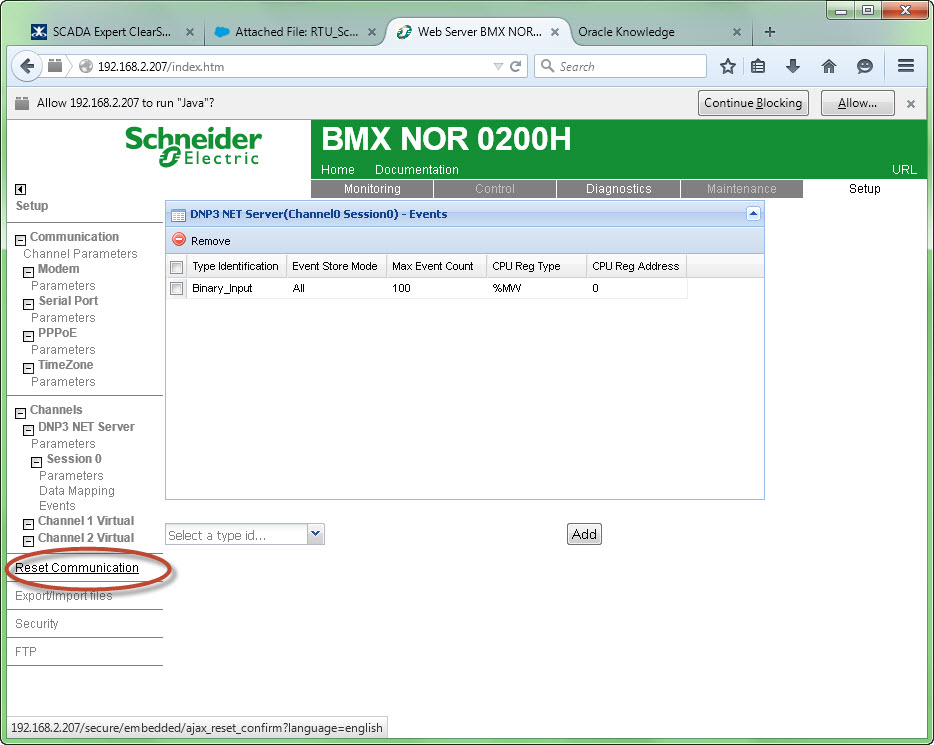
- Click on 'Events' in the 'Setup' menu list.
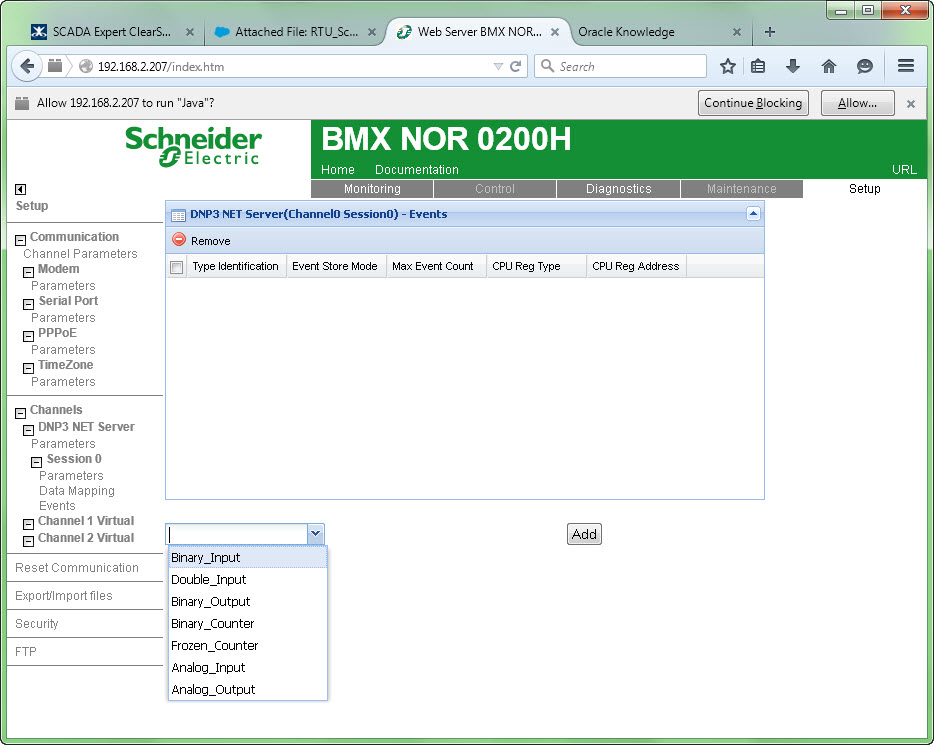
- Click on the down arrow next to the textbox labeled 'Select a type id'
- Select the event type from the drop down list.
- Click on 'Add'.
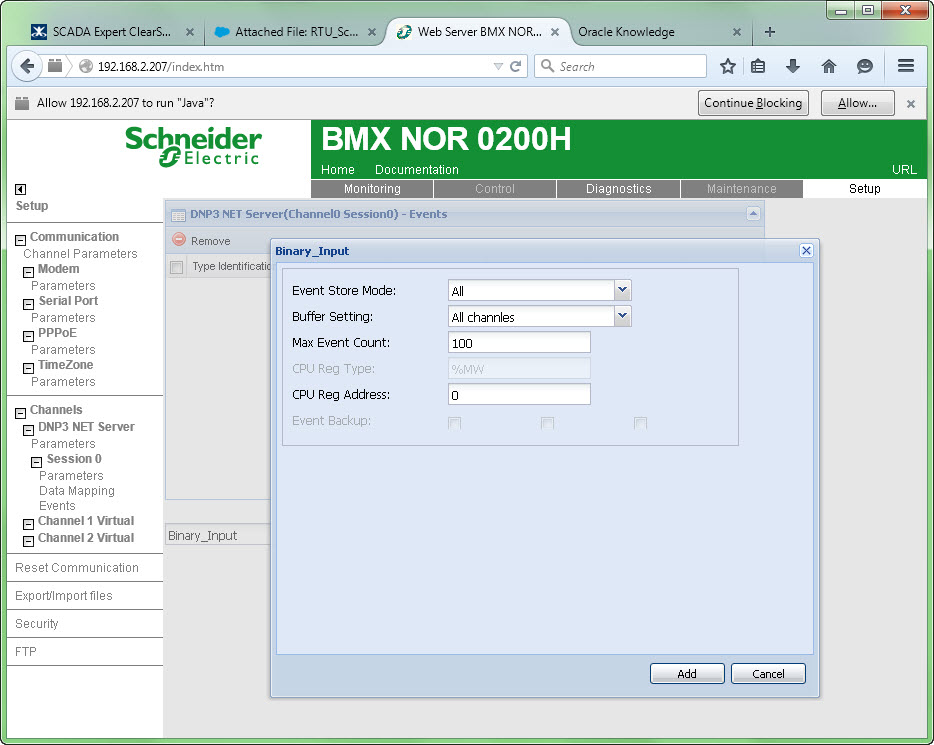
- Click on the down arrow next to 'Event Store Mode' and select the appropriate store mode.
- Click on the down arrow next to 'Buffer String' and select the appropriate buffer string type..
- Enter the CPU register address that will be used to store the events count.
- Click on 'Add'.
- Click on 'Reset Communications' to allow the changes to take effect..
Publikováno pro:Schneider Electric Česká republika
Issue
Provide an example on how to configure a DNP3 point in the BMXNOR0200 to get a timestamp when the point
DNP3 value changes.
Product Line
BMXNOR0200
Environment
Windows 10
Resolution
The following steps can be used to configure the BMXNOR0200 for accessing a DNP3 point with a timestamp
from a SCADA.


Provide an example on how to configure a DNP3 point in the BMXNOR0200 to get a timestamp when the point
DNP3 value changes.
Product Line
BMXNOR0200
Environment
Windows 10
Resolution
The following steps can be used to configure the BMXNOR0200 for accessing a DNP3 point with a timestamp
from a SCADA.
- Click on 'Data Mapping' in the 'Setup' menu list to open the 'Data Mapping' web page.
- Click on the down arrow next to the textbox labeled 'Select a type id'
- Select the DNP3 point type from the drop down list.
- Click on Add
- Enter the appropriate information to define the DNP3 point.
- Select 'CPU Reg Mapping' as 'Value only'.
- Select 'Default Static Variation' as 'g1v1 Binary In'.
- Select 'Default Event Variation' as 'g2v2 Binary Input with time'.
- Click on 'Change'.
- Click on 'Events' in the 'Setup' menu list.
- Click on the down arrow next to the textbox labeled 'Select a type id'
- Select the event type from the drop down list.
- Click on 'Add'.
- Click on the down arrow next to 'Event Store Mode' and select the appropriate store mode.
- Click on the down arrow next to 'Buffer String' and select the appropriate buffer string type..
- Enter the CPU register address that will be used to store the events count.
- Click on 'Add'.
- Click on 'Reset Communications' to allow the changes to take effect..
Publikováno pro:Schneider Electric Česká republika


